


Cinnamon Stripe Scones
A Pinch of Nostalgia: Bob’s Scone Story

7/31/23
When I first met my husband, Bob Zagoren, I didn’t know much about scones. I certainly didn’t grow up with them; we always had biscuits in Oklahoma. I had never seen a scone until I moved to New York. That’s where it all started, my scone education, from a man who was obsessed with them. We met because we lived in the same building on East 72nd Street. He had become friendly with the concierge, so one day he was singing her a Gershwin song: “they’re singing songs of love, but not for me.” She was very astute and, noticing his dilemma right away, told him about this genuinely nice woman in 5D. So that’s how we met; the concierge did it.
He loved to tell me about the time before I met him, when he lived on Long Island, and commuted by train to his job in New York. Bob was VP of Engineering at the CBS network and engineered the setup for football games, political conventions, and other major events, to get them ready for the broadcast. He had a plethora of stories about those too, but this is his scone story. Bob’s scone story.
This is the way he told it to me. When he got to the city, he would exit the subway station and head across West 57th Street straight for a little French bakery on the corner. There he would buy a large coffee and two scones on the way to his office at CBS. He savored his scones and sipped his coffee as he went through his in-box. Every single morning, he repeated this same ritual for years, yet never tired of those crusty golden brown scones.
I can’t count the times Bob told me this story, embellishing it from time to time, but I enjoyed listening to it because he was so enthusiastic in the telling and so enthralled with scones. I would ask him questions like what flavors were they, what shapes, and what was the name of the little French bakery? But he was less interested in the details than in “his two scones”
It soon became clear that if I was going to live with this man, I had to learn to make these things, because that’s all he ever wanted for breakfast. Of course, I never do anything half-way, so I embarked on an intensive research and development phase that lasted years, determined to create some solid great-tasting scone recipes. This phase still rears its head now and then, like now, when the slightest bit of inspiration appears on my radar.
Bob took an outsized interest in my scone project and was never at a loss for words when it came time to evaluate the latest batch. He not only loved projects but had a well-honed palate and became my designated taster. As I baked my way through countless recipes, many a morning, whether there was snow on the ground or the flowers were blooming, we would have our breakfast scone conversation, discussing the pros and cons of each one. This involved what changes to make, such as needs more cinnamon—a common Bob criticism—but in the end he would give me a thumbs-up or a thumbs-down. Soon, I became as obsessed with scones as Bob was.

During this time, I went to cooking school and later became a pastry chef. In another newsletter I will write about my extraordinary scone experience on my very first day of cooking school.
Good dependable recipes were also a priority for my pastry chef job, where we baked a wide assortment of breakfast pastries for the front counter in our café as well as for the morning bread baskets that went on each table. Scones were a big part of this and I never took a thumbs-down recipe to work; I took only the best ones.
Looking back at all the scone recipes that I created, and remembering the story behind each one is like a little pinch of nostalgia today. I think about what Bob had said about each one, and all the trials, the tweaks, the errors, the failures, the winners, and occasionally a sensation. These are great memories.
I must smile, knowing that Bob is on the other shore, having his coffee and scones—Cinnamon Stripe Scones—and giving them a thumbs-up, because this was his all-time favorite. Bob passed away in 2016.
Recipe:
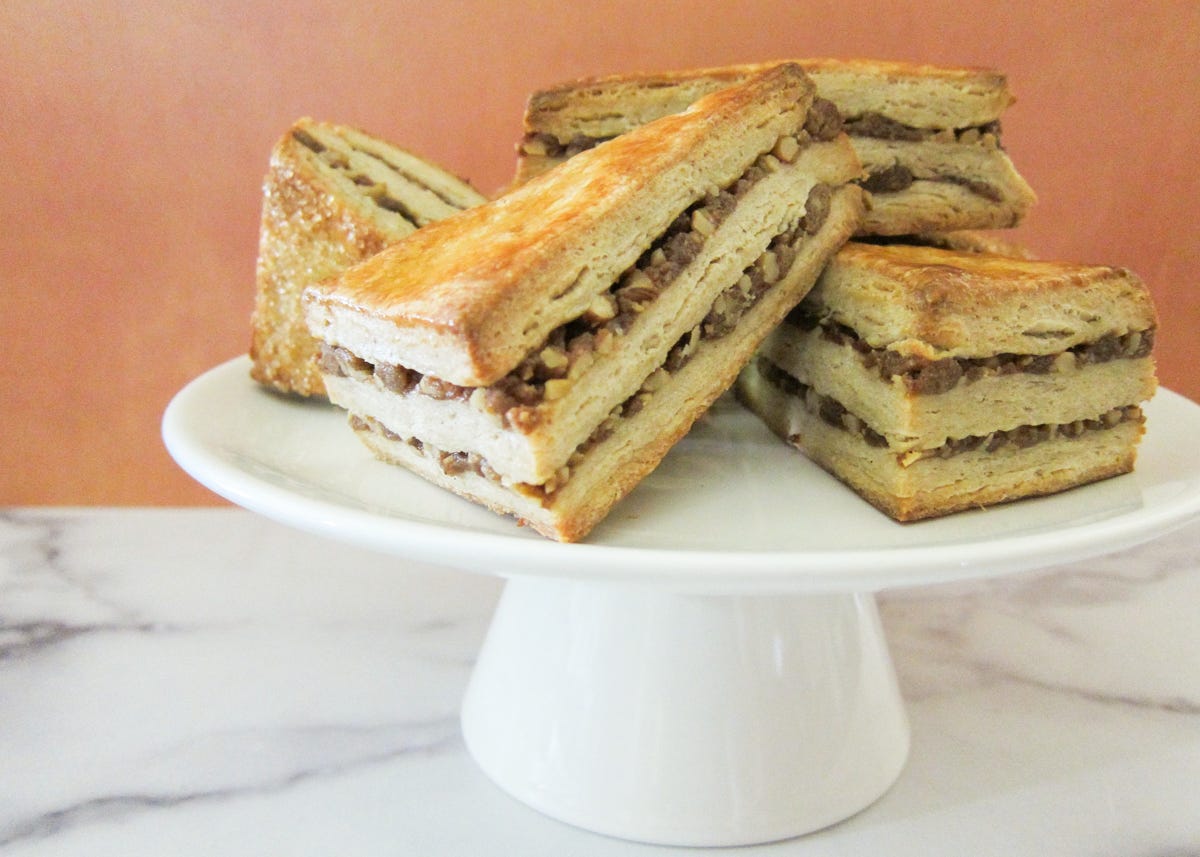
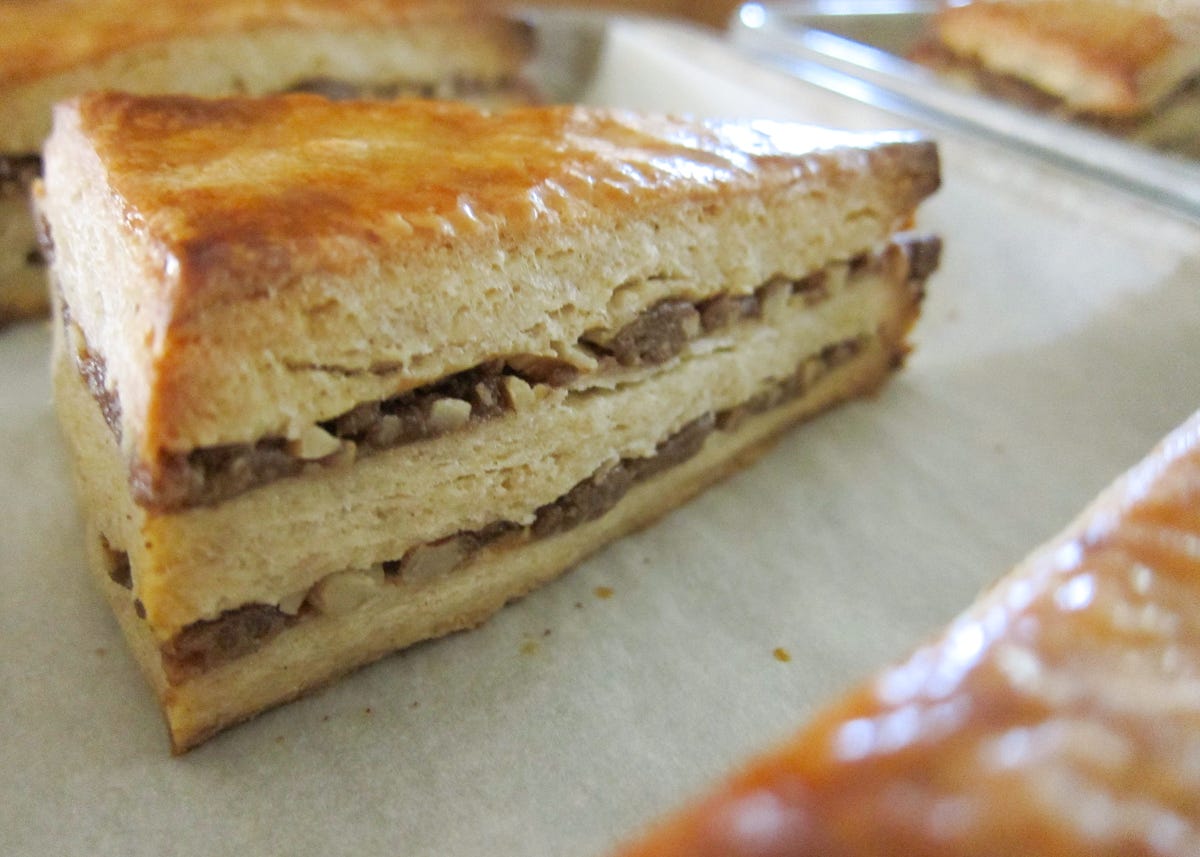
This super cinnamon-y scone recipe is made with 5 layers: 3 layers of dough and 2 filling layers, creating the stripes. It requires refrigeration time for firming up the dough layers making them easier to work with, as well as an overnight stay in the refrigerator of the assembled layers.
Cinnamon Stripe Scones
YIELD: 20 Scones - 4 oz (120g) Each—Quarter Sheet Pan of Dough = 5 lb
DRY MIX
850 grams unbleached all-purpose flour, King Arthur (6 cups)
150 grams granulated sugar (3/4 cup)
40 grams baking powder (2 Tablespoons + 2 teaspoons) 4.7% (B%)
10 grams fine sea salt (2 teaspoons)
1 teaspoon ground cinnamon, Viet Nam
1/2 teaspoon freshly grated nutmeg
340 grams cold unsalted butter, cut in 1/4" slices (6 mm) (3 sticks / 12 oz)
LIQUID MIX:
240 grams heavy cream (1 cup)
120 grams whole milk (1/2 cup)
150 grams whole eggs (3 large)
10 grams vanilla extract (2 tsp)
1895 grams = Total Dough 67 oz (4 lb 3 oz)
CINNAMON STRIPE FILLING:
150 grams light brown sugar (3/4 cup)
60 grams dark brown sugar (1/3 cup)
45 grams unbleached all-purpose flour (1/3 cup)
30 grams Instant Clear Jel ( 1/4 cup)
10 grams ground cinnamon, Viet Nam (1 Tablespoon + 2 teaspoons)
120 grams walnuts, toasted and chopped fine (1 cup)
45 grams unsalted butter, softened (3 Tablespoons)
50 grams whole egg, whisked until smooth (1 large)
515 grams = Total Filling 18 oz (1 lb 2 oz)
2405 grams = Total Recipe 85 oz (5 lb 5 oz)
EGG WASH:
100 grams eggs (2 large)
20 grams egg yolk (1 large)
1 Tablespoon heavy cream or milk
1/8 teaspoon fine sea salt
OPTIONAL SUGAR TO SPRINKLE ON TOPS:
As Needed - Turbinado Sugar (Sugar-in-the-Raw)
1. TO GET READY: For chilling the layers of dough, you will need a quarter sheet pan 9' x 12" (23 x 30 cm) lined with foil. The same pan can be used later for assembling the dough and filling layers. Also, have ready some quarter size parchment paper. Just cut half size parchment in half for this.
For baking, use 2 half sheet pans stacked together. Double panning prevents the bottoms of the scones from over-browning. Also, I mix this recipe in my Kitchen Aid mixer, but you can mix it by hand or in a food processor, in batches.
2. TO MAKE THE SCONE DOUGH: Pulse dry ingredients together on low speed in Kitchen Aid (or other mixer) bowl. Scatter cold butter slices over the flour. Using the paddle, mix in the butter on low speed until the mixture looks mostly "mealy," with some butter flakes left. Turn off mixer and check for any large chunks of butter; rub those into flakes by hand.
Whisk the cream, milk, eggs, and vanilla in a medium size bowl and add to mixer. Pulse in on low speed until dough just comes together. Scrape up the bottom of the bowl and mix in any remaining dry mix. Turn the dough out onto a floured counter. Press it together into a rough rectangle about 8" x 12" (20 x 30 cm). Fold dough in half and turn it so that the folded edge is facing you. Repeat, patting the dough into a rectangle each time, and doing a total of 3 half-folds.
Divide and scale the dough into 3 portions: 625 grams each. Flour a quarter sheet of parchment and gently roll out each portion of dough on the paper, making sure to roll it into the corners. This is an easy way to get your dough the same size as the pan, and also makes it easier to handle. Slide each sheet of dough with its paper into a quarter sheet pan, stacking the layers. Refrigerate until the dough feels cold and firm, about 2 hours.
3. TO MAKE THE CINNAMON STRIPE FILLING: Scale all the dry ingredients into a bowl. Rub together with your hands until the brown sugars are lump-free. Add the nuts and soft butter and rub in evenly. Add the beaten egg and stir with a rubber spatula until well mixed or mix with your hands. Divide and scale into 2 parts: 250 grams each. Chill briefly, about 30 minutes, then crumble into fine pieces so that it will be easy to spread on the dough.
4. TO ASSEMBLE THE LAYERS OF DOUGH & CINNAMON STRIPE FILLING: Remove dough layers from refrigerator. Lift off the top two dough layers and set aside, leaving the bottom layer of dough in the pan. Brush it generously with egg wash which helps the filling stick. Scatter half of the filling (250 grams) over the dough and spread evenly with your hands, making sure that you cover the dough entirely.
Add the second dough layer and brush with egg wash. Spread balance of filling (250 grams) over the dough. Top with the last layer of dough. Roll over the top with a rolling pin to smooth it out. Wrap tightly with plastic wrap and refrigerate overnight.
5. PRE-HEAT OVEN TO 425° F (218° C) when ready to cut the scones the next day. Also, whisk together the egg wash ingredients just until smooth.
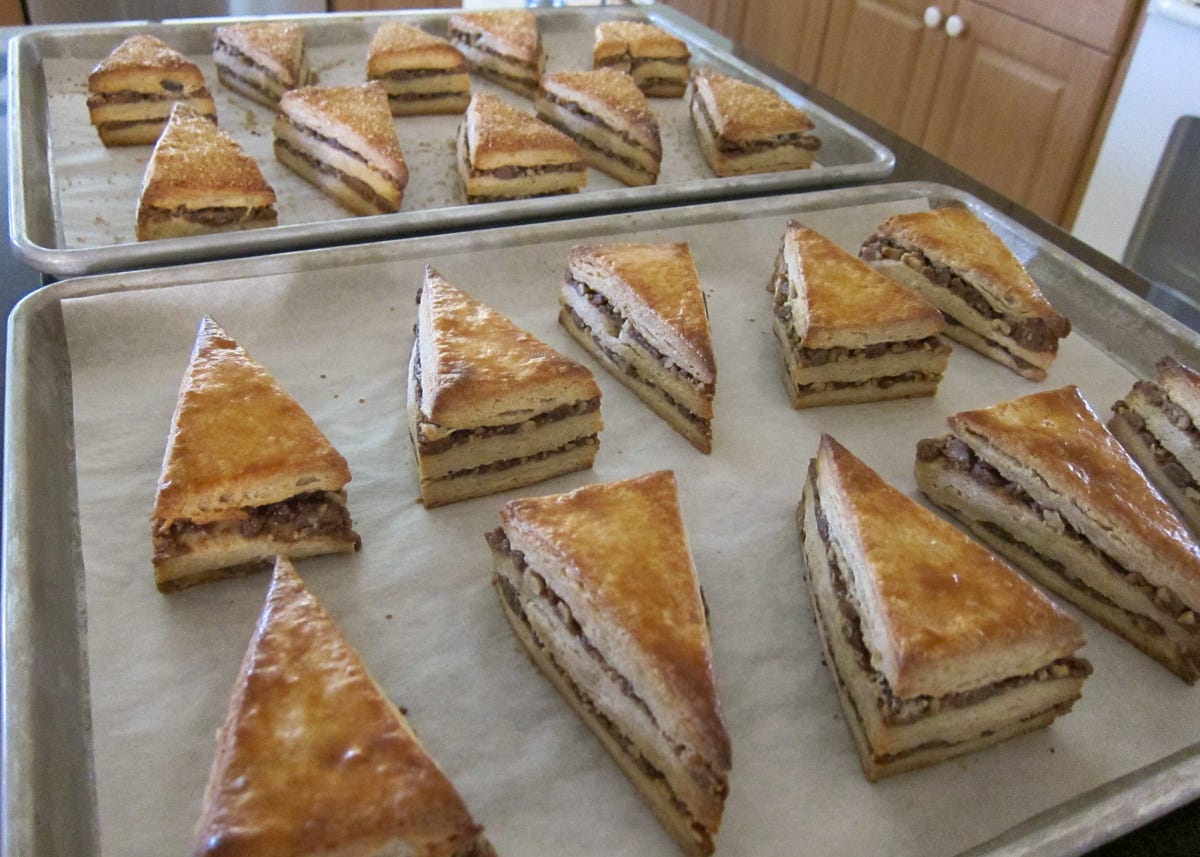
6. TO CUT SCONE DOUGH: Lift the cold assembled dough from the pan and place on a cutting board. Remove the bottom parchment and replace with a new dry sheet. This will make it easier to cut. Cut the slab of dough down the center lengthwise into two strips 4 inches (10 cm) wide. Cut each strip into triangles 2 1/4" x 4” (5.7 x 10 cm). Tip: Cut a triangle template this size from an index card. It will be easier to cut the scones all the same size and shape, which also means they will bake evenly.
Arrange the triangles on prepared pan. A half sheet pan will hold 10 scones (2 rows of 5), which is half of the recipe. If they get too soft while cutting them, put them back in refrigerator or freezer until they feel firm again before baking. Scone dough should be very cold before baking.
7. TO BAKE SCONES: Brush the tops only with egg wash. Be careful not to let the egg wash drip down the sides, which will hinder their rise. Sprinkle with the optional sugar or leave plain. Plan on baking one pan of scones at a time on the middle shelf.
8. BAKE at 425°F (218° C) for 15 minutes. After 15 minutes, rotate pan, cover loosely with a sheet of aluminum foil to prevent over-browning, and turn oven down to 400° F (204° C). Also, I insert a probe thermometer into one of the scones at this point. If you have one, this is the time to insert it, after a crust has formed. Continue baking for another 8-10 minutes. Total baking time 23-25 minutes. If using a thermometer, the internal temperature should be 209-210° F (98-99° C) for fully baked scones.
9. COOL in the pan for about 10 minutes, then transfer to a wire rack to finish cooling. If you only have one set of baking pans, let them cool before baking the second batch.
Recipe Ancestry: I adapted the layered concept for these scones (but not the recipe) from Food & Wine Magazine, March 2003. The recipe was for Iced Cinnamon Bun Scones by Marcy Goldman. Omg, I developed this recipe 2/25/03 and revised it on 2/24/13 and 7/24/23.
The Process: Dough Assembly and Cutting the Scones


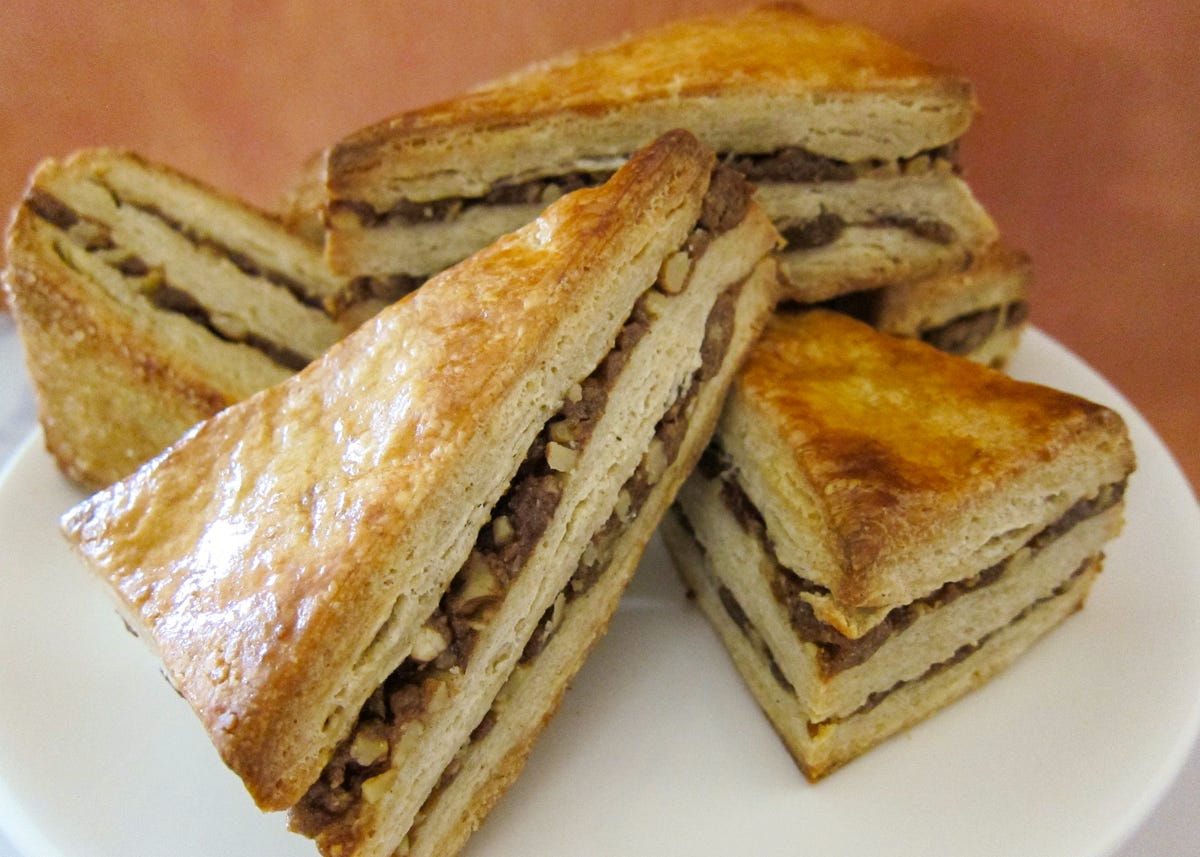
Freshly Baked Scones:
About Instant ClearJel:
This is what I use. For bakers, this is a product worth knowing about. I use it in pie fillings and other fillings where I need a thickener. And in recipes like this scone recipe where I don’t want the filling to ooze out. It’s so easy to use and an essential baking ingredient for me; I couldn’t live without it.
If you want to try it in a smaller quantity, you can get from King Arthur. Amazon also sells the King Arthur brand. However, smaller quantities cost more per ounce.
What is it? It’s a corn based starch, made primarily from waxy maize, that has been pre-gelatinized, meaning pre-cooked. The label on a jar of Instant ClearJel will say “Modified Food Starch,” (already cooked). There are two kinds: Regular ClearJel and Instant ClearJel. Be sure and buy “Instant,” because it is much more versatile. It works in cold dishes without cooking, such as a fresh strawberry pie, or you can cook it or bake it. Regular ClearJel must be cooked, and is used primarily for canning and pies that will be frozen, either baked or unbaked. It is used in many commercially made pies.
Here’s how to substitute Instant ClearJel for other starches: To use in place of corn starch or tapioca in a recipe, use the same amount. To replace flour, use the same or a little less. So Instant ClearJel has basically the same thickening power as all of these other starches, except it’s a little stronger than flour. I use it in a 1:1 ratio by weight when subbing for any of these.
My one word of caution when using Instant ClearJel has to do with sugar. Always mix it with some or all of the sugar in your recipe before adding it to a liquid or This slows the rate of hydration and prevents it from lumping. If added directly to a liquid, it will totally lump up. Just ask me how I know this. Still, whisk into a liquid briskly and you will have no issues. I even mix it with sugar when I’m adding it to non-liquid ingredients, like in this recipe.
Scone Presentation:


All photographs on this post were shot by the author: Shirl Gard© 2023
Please let me know what you think, about either about Bob’s Scone Story or the recipe. I would love to hear from you. Until next time.
Thank you for sharing your story and your recipe! I need a large quantity like this for the Sunday mornings I bake for coffee hour. These will be perfect. I also appreciate the clear gel tutorial. Always learning!
I love hearing about you and Bob as much as the scones! Shirley you are a great writer!